

 Set up docs MCP
When deploying ClickStack in production, there are several additional considerations to ensure security, stability, and correct configuration. These vary depending on the distribution - Open Source or Managed - being used.
For production deployments, Managed ClickStack is recommended. It applies industry-standard security practices by default - including enhanced encryption, authentication and connectivity, and managed access controls, as well as providing the following benefits:
- Automatic scaling of compute independent of storage
- Low-cost and effectively unlimited retention based on object storage
- The ability to independently isolate read and write workloads with Warehouses.
- Integrated authentication
- Automated backups
- Seamless upgrades
Follow these best practices for ClickHouse Cloud when using Managed ClickStack.
Secure ingestion
By default, the ClickStack OpenTelemetry Collector isn’t secured when deployed outside of the Open Source distributions and doesn’t require authentication on its OTLP ports.
To secure ingestion, specify an authentication token when deploying the collector using the OTLP_AUTH_TOKEN environment variable. See “Securing the collector” for further details.
Create an ingestion user
It’s recommended to create a dedicated user for the OTel collector for ingestion into Managed ClickHouse and ensuring ingestion is sent to a specific database e.g. otel. See “Creating an ingestion user” for further details.
Configure Time To Live (TTL)
Ensure the Time To Live (TTL) has been appropriately configured for your Managed ClickStack deployment. This controls how long data is retained for - the default of 3 days often needs to be modified.
Estimating Resources
The following provides a model for estimating the compute and storage resources required for a ClickStack deployment based on your expected ingest volume. The values produced are estimates only and should be used as an initial baseline - they are not a prescriptive answer. Actual requirements depend on query complexity, concurrency, retention policies, and variance in ingestion throughput. Always monitor resource usage and scale as needed.
When deploying ClickStack, provision compute to cover two independent workloads: ingest and query.
| Workload | Estimated resources |
|---|---|
| Ingest | 1 vCPU per 10 MB/s of sustained ingest throughput |
| Query | 1 vCPU per 1 QPS and per 10 MB/s of sustained ingest throughput |
Assumptions
- A 10x compression ratio for storage - typically conservative for logs and traces.
- Query SLAs of a P50 of 1.5 seconds and a P99 of 5 seconds.
- We assume most queries occur over recent data, following a log-normal distribution that peaks at around one hour and tails out to around six hours. Users may wish to provision dedicated compute to query older data. In ClickHouse Cloud this can be idle (thus not incuring costs) when not in use.
- While query compute can be scaled independently of ingest compute, it remains intrinsically linked to ingest volume. We assume as ingest increases, data density grows, resulting in larger scan volumes at query time and consequently higher query compute requirements.
The following table provides example sizings based on increasing ingest throughput in megabytes per second, alongside the corresponding data volumes in terabytes per month. This assumes a sustained average of 1 QPS from ClickStack across all query types (search, dashboards, alerting).
| MB/s | TB/month | Ingest CPUs | Query CPUs | Total CPUs | Total Storage (per month) (GB) |
|---|---|---|---|---|---|
| 10 | 25.92 | 1 | 3 | 4 | 2,592 |
| 20 | 51.84 | 2 | 6 | 8 | 5,184 |
| 50 | 129.6 | 5 | 15 | 20 | 12,960 |
| 100 | 259.2 | 10 | 30 | 40 | 25,920 |
| 200 | 518.4 | 20 | 60 | 80 | 51,840 |
| 500 | 1,296 | 50 | 150 | 200 | 129,600 |
| 1000 | 2,592 | 100 | 300 | 400 | 259,200 |
For more details on refining sizing assumptions for your environment, see “Refining sizing assumptions for your environment”.
Isolating observability workloads
If you’re adding ClickStack to an existing ClickHouse Cloud service that already supports other workloads, such as real-time application analytics, isolating observability traffic is strongly recommended.
Use Managed Warehouses to create a child service dedicated to ClickStack. This allows you to:
- Isolate ingest and query load from existing applications
- Scale observability workloads independently
- Prevent observability queries from impacting production analytics
- Share the same underlying datasets across services when needed
This approach ensures your existing workloads remain unaffected while allowing ClickStack to scale independently as observability data grows.
For larger deployments or custom sizing guidance, please contact support for a more precise estimate.
Network and port security
By default, Docker Compose exposes ports on the host, making them accessible from outside the container - even if tools like ufw (Uncomplicated Firewall) are enabled. This behavior is due to the Docker networking stack, which can bypass host-level firewall rules unless explicitly configured.
Recommendation:
Only expose ports that are necessary for production use. Typically the OTLP endpoints, API server, and frontend.
For example, remove or comment out unnecessary port mappings in your docker-compose.yml file:
ports:
  - "4317:4317"  # OTLP gRPC
  - "4318:4318"  # OTLP HTTP
  - "8080:8080"  # Only if needed for the API
# Avoid exposing internal ports like ClickHouse 8123 or MongoDB 27017.
Refer to the Docker networking documentation for details on isolating containers and hardening access.
Session secret configuration
In production, you must set a strong, random value for the EXPRESS_SESSION_SECRET environment variable for ClickStack UI (HyperDX) - to protect session data and prevent tampering.
Here’s how to add it to your docker-compose.yml file for the app service:
  app:
    image: ${IMAGE_NAME_HDX}:${IMAGE_VERSION}
    ports:
      - ${HYPERDX_API_PORT}:${HYPERDX_API_PORT}
      - ${HYPERDX_APP_PORT}:${HYPERDX_APP_PORT}
    environment:
      FRONTEND_URL: ${HYPERDX_APP_URL}:${HYPERDX_APP_PORT}
      HYPERDX_API_KEY: ${HYPERDX_API_KEY}
      HYPERDX_API_PORT: ${HYPERDX_API_PORT}
      HYPERDX_APP_PORT: ${HYPERDX_APP_PORT}
      HYPERDX_APP_URL: ${HYPERDX_APP_URL}
      HYPERDX_LOG_LEVEL: ${HYPERDX_LOG_LEVEL}
      MINER_API_URL: 'http://miner:5123'
      MONGO_URI: 'mongodb://db:27017/hyperdx'
      NEXT_PUBLIC_SERVER_URL: http://127.0.0.1:${HYPERDX_API_PORT}
      OTEL_SERVICE_NAME: 'hdx-oss-api'
      USAGE_STATS_ENABLED: ${USAGE_STATS_ENABLED:-true}
      EXPRESS_SESSION_SECRET: "super-secure-random-string"
    networks:
      - internal
    depends_on:
      - ch-server
      - db1
You can generate a strong secret using openssl:
openssl rand -hex 32Avoid committing secrets to source control. In production, consider using environment variable management tools (e.g. Docker Secrets, HashiCorp Vault, or environment-specific CI/CD configs).
Secure ingestion
All ingestion should occur via the OTLP ports exposed by ClickStack distribution of the OpenTelemetry (OTel) collector. By default, this requires a secure ingestion API key generated at startup. This key is required when sending data to the OTel ports, and can be found in the HyperDX UI under Team Settings → API Keys.
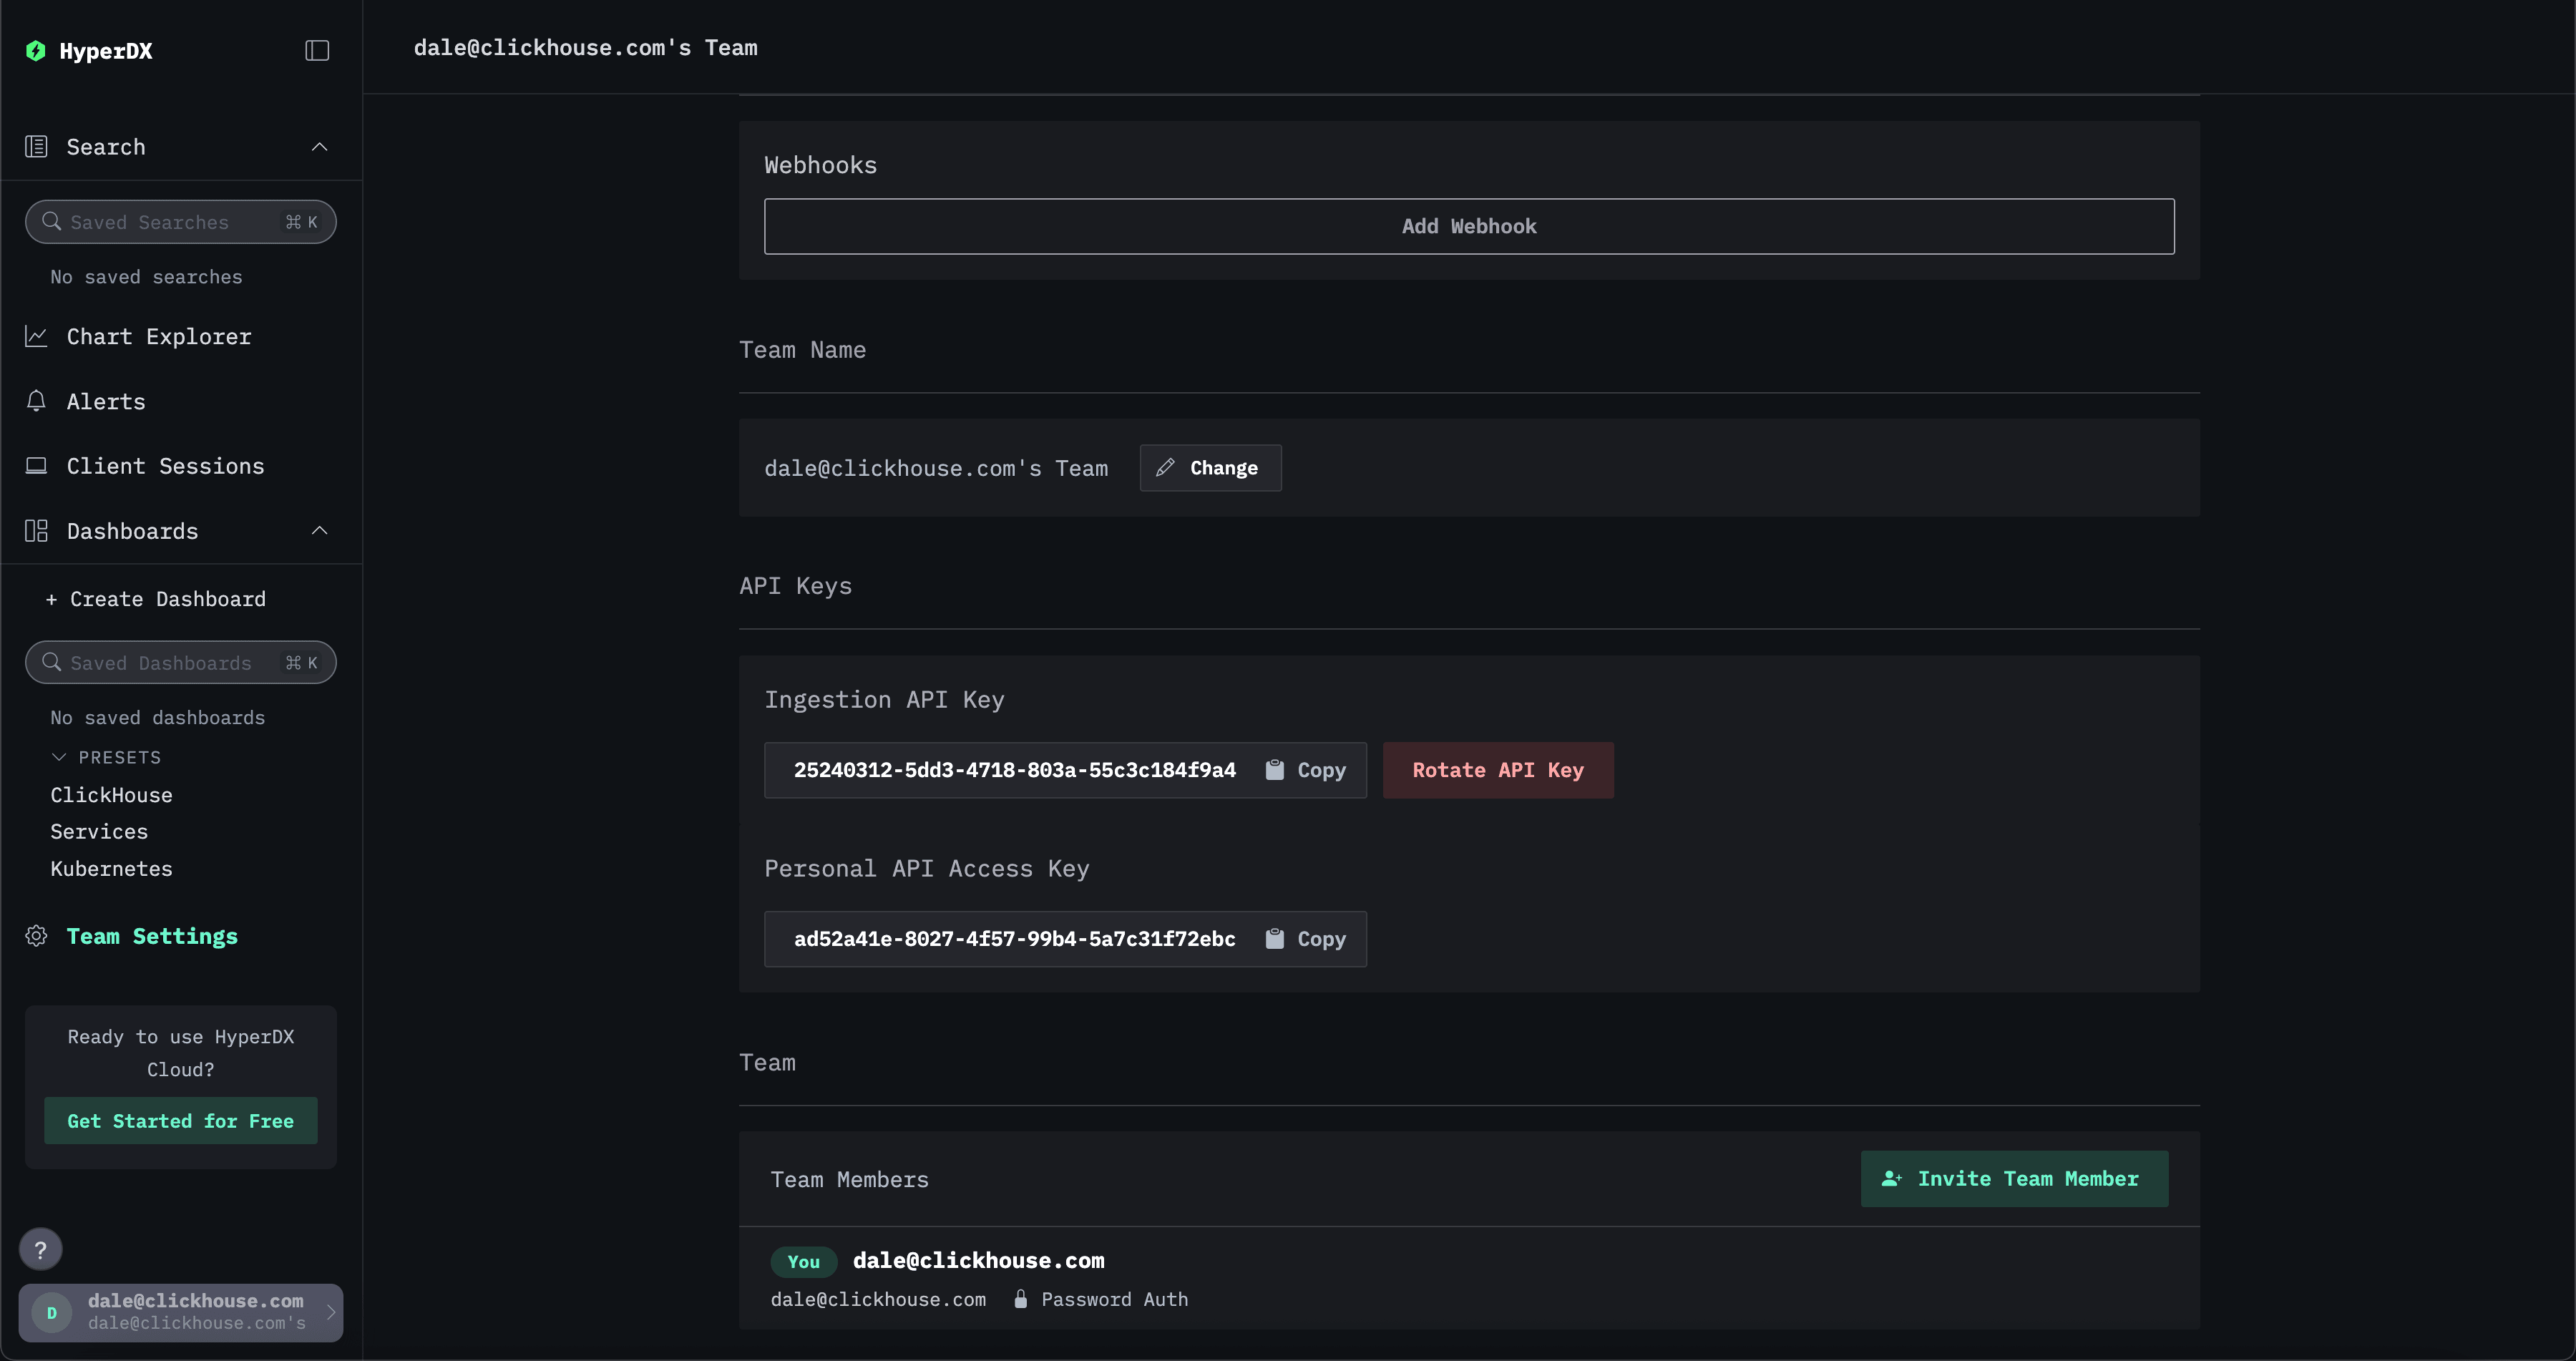
Additionally, enabling TLS for OTLP endpoints is recommended.
Create an ingestion user
Creating a dedicated user for the OTel collector for ingestion into ClickHouse and ensuring ingestion is sent to a specific database e.g. otel is recommended. See “Creating an ingestion user” for further details.
ClickHouse
Users managing their own ClickHouse instance should adhere to the following best practices.
Security best practices
If you’re managing your own ClickHouse instance, it’s essential to enable TLS, enforce authentication, and follow best practices for hardening access. See this blog post for context on real-world misconfigurations and how to avoid them.
ClickHouse OSS provides robust security features out of the box. However, these require configuration:
- Use TLS via
tcp_port_secureand<openSSL>inconfig.xml. See guides/sre/configuring-tls. - Set a strong password for the
defaultuser or disable it. - Avoid exposing ClickHouse externally unless explicitly intended. By default, ClickHouse binds only to
localhostunlesslisten_hostis modified. - Use authentication methods such as passwords, certificates, SSH keys, or external authenticators.
- Restrict access using IP filtering and the
HOSTclause. See sql-reference/statements/create/user#user-host. - Enable Role-Based Access Control (RBAC) to grant granular privileges. See operations/access-rights.
- Enforce quotas and limits using quotas, settings profiles, and read-only modes.
- Encrypt data at rest and use secure external storage. See operations/storing-data and cloud/security/CMEK.
- Avoid hard coding credentials. Use named collections or IAM roles in ClickHouse Cloud.
- Audit access and queries using system logs and session logs.
See also external authenticators and query complexity settings for managing users and ensuring query/resource limits.
User permissions for ClickStack UI
The ClickHouse user for the ClickStack UI only needs to be a readonly user with access to change the following settings:
max_rows_to_read(at least up to 1 million)read_overflow_modecancel_http_readonly_queries_on_client_closewait_end_of_query
By default, the default user in both OSS and ClickHouse Cloud will have these permissions available however you’re recommended to create a new user with these permissions.
Configure Time To Live (TTL)
Ensure the Time To Live (TTL) has been appropriately configured for your ClickStack deployment. This controls how long data is retained for - the default of 3 days often needs to be modified.
MongoDB guidelines
Follow the official MongoDB security checklist.