Set up docs MCP
ClickHouse BYOC on GCP supports two private connection options including VPC Peering and PSC (Private Service Connect).
Prerequisites
Common steps required by both VPC peering and PSC.
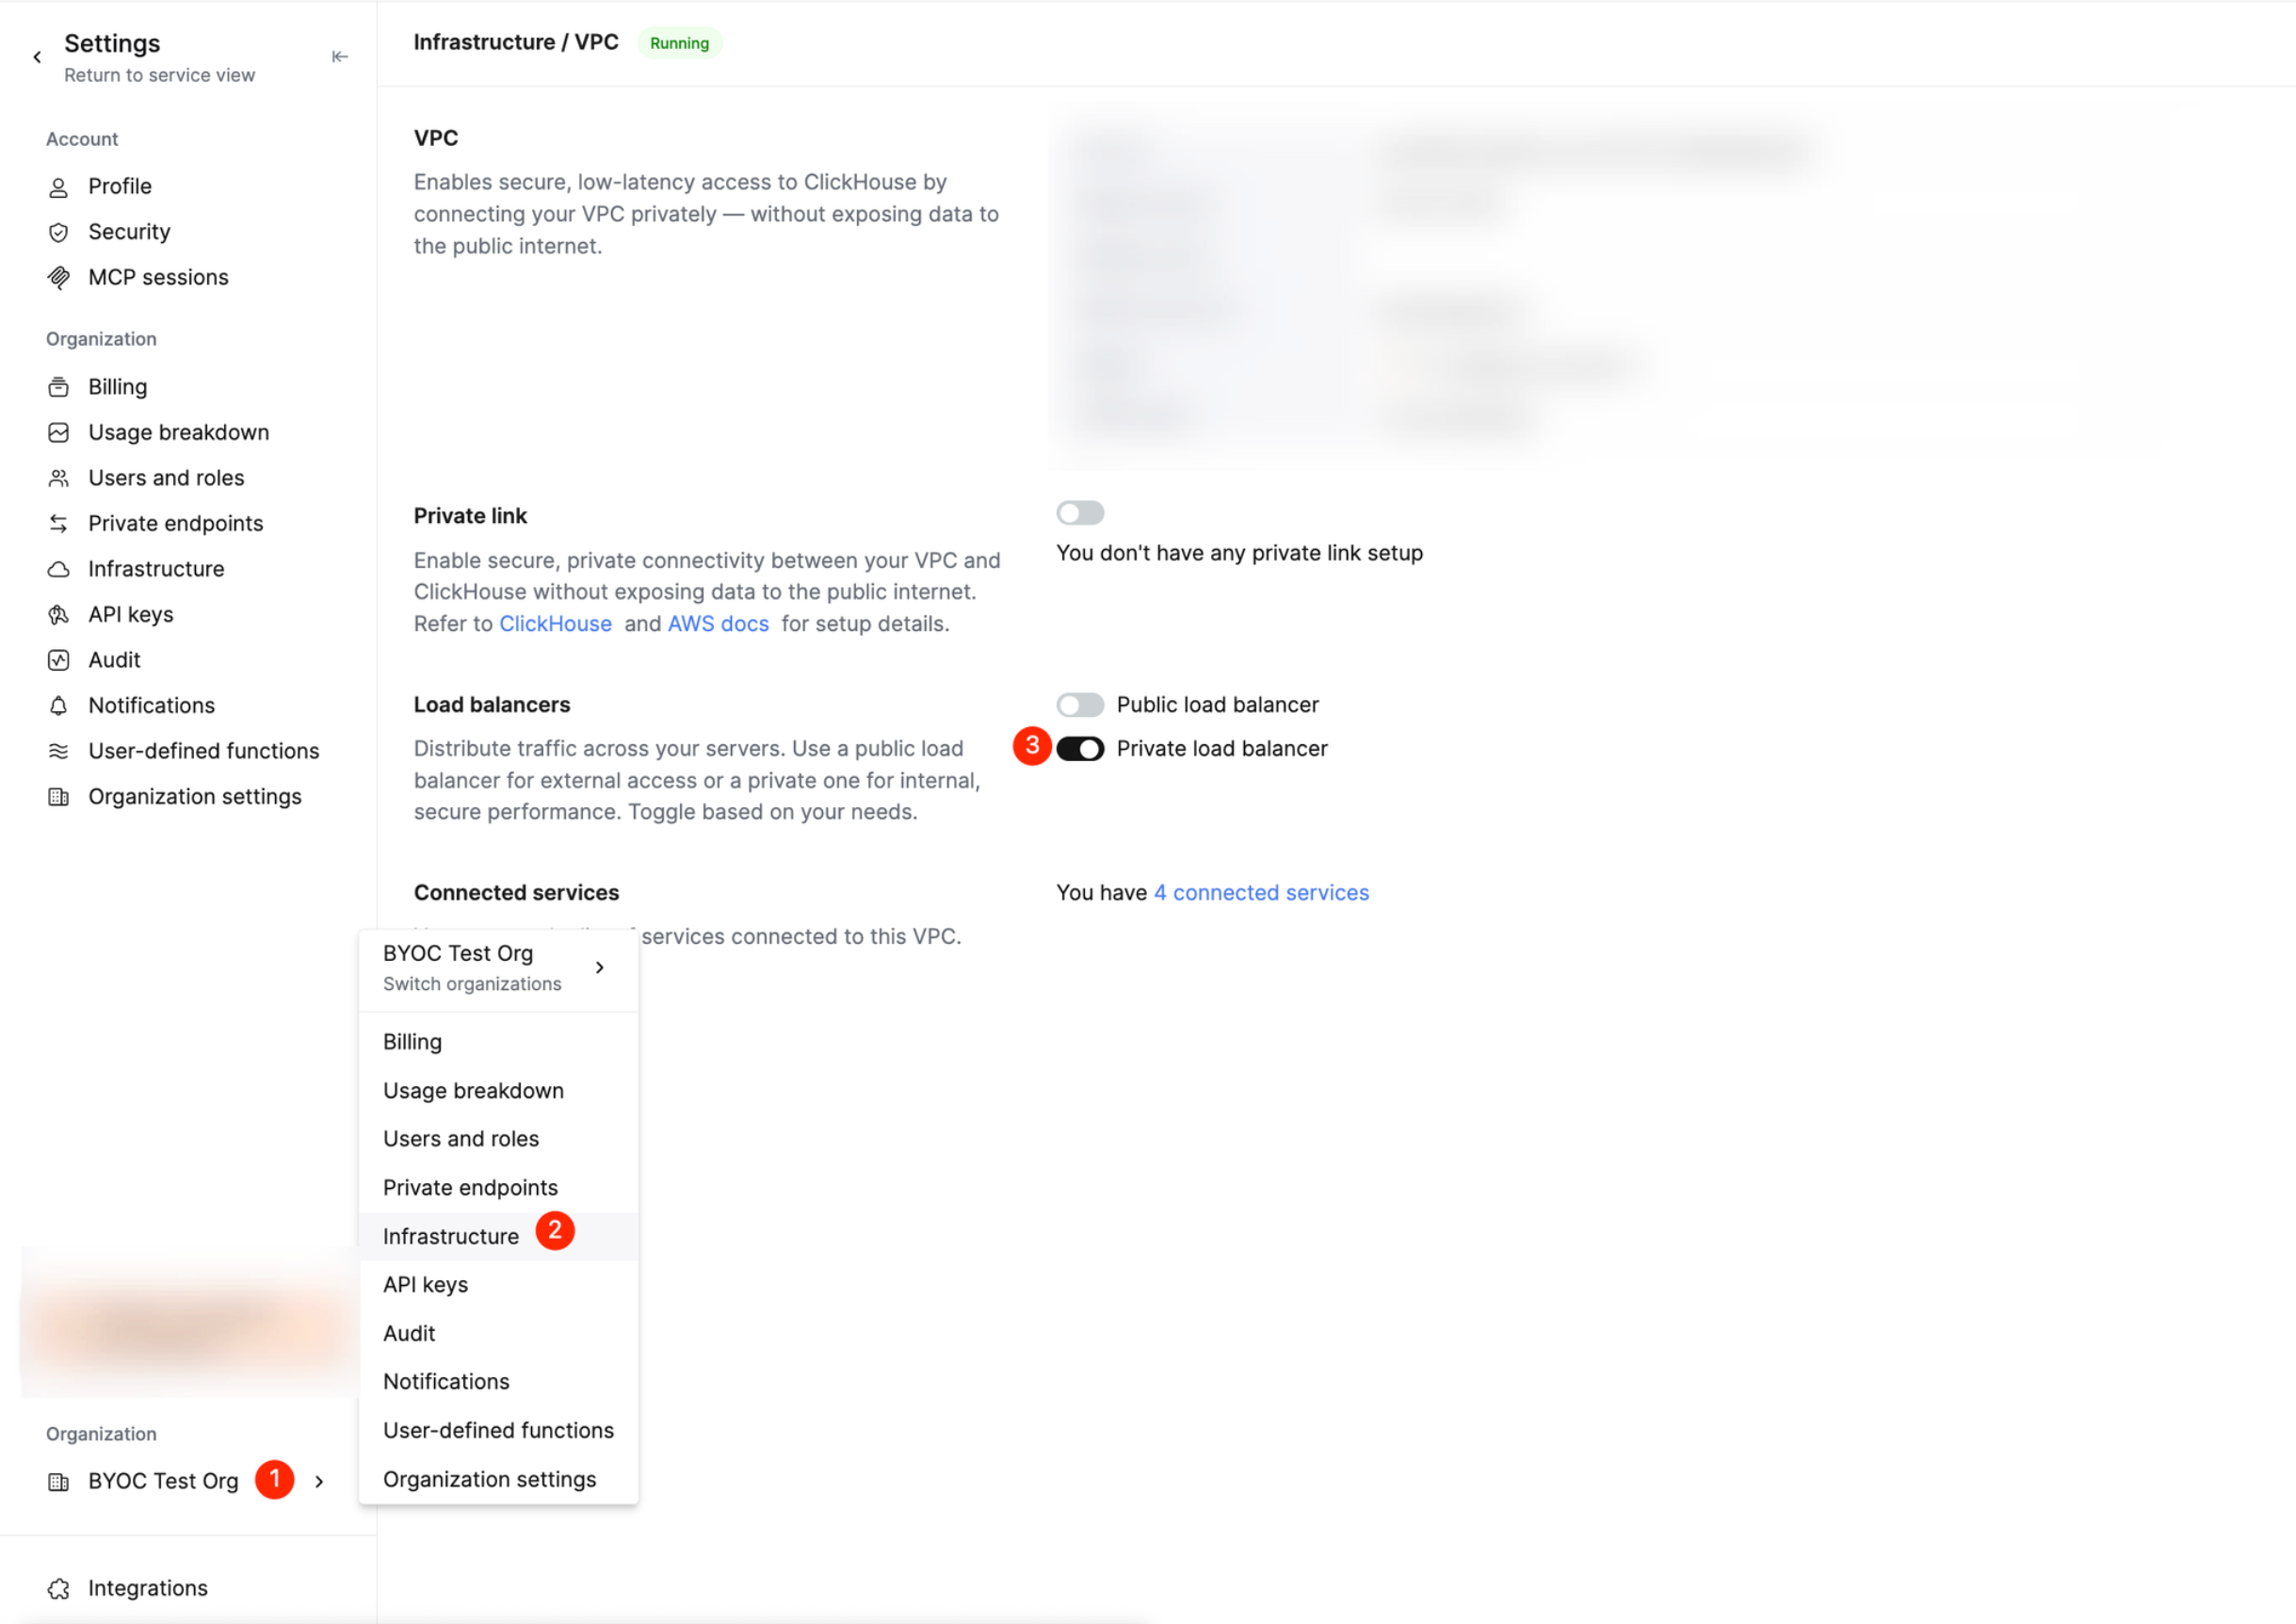
Enable private load balancer for ClickHouse BYOC
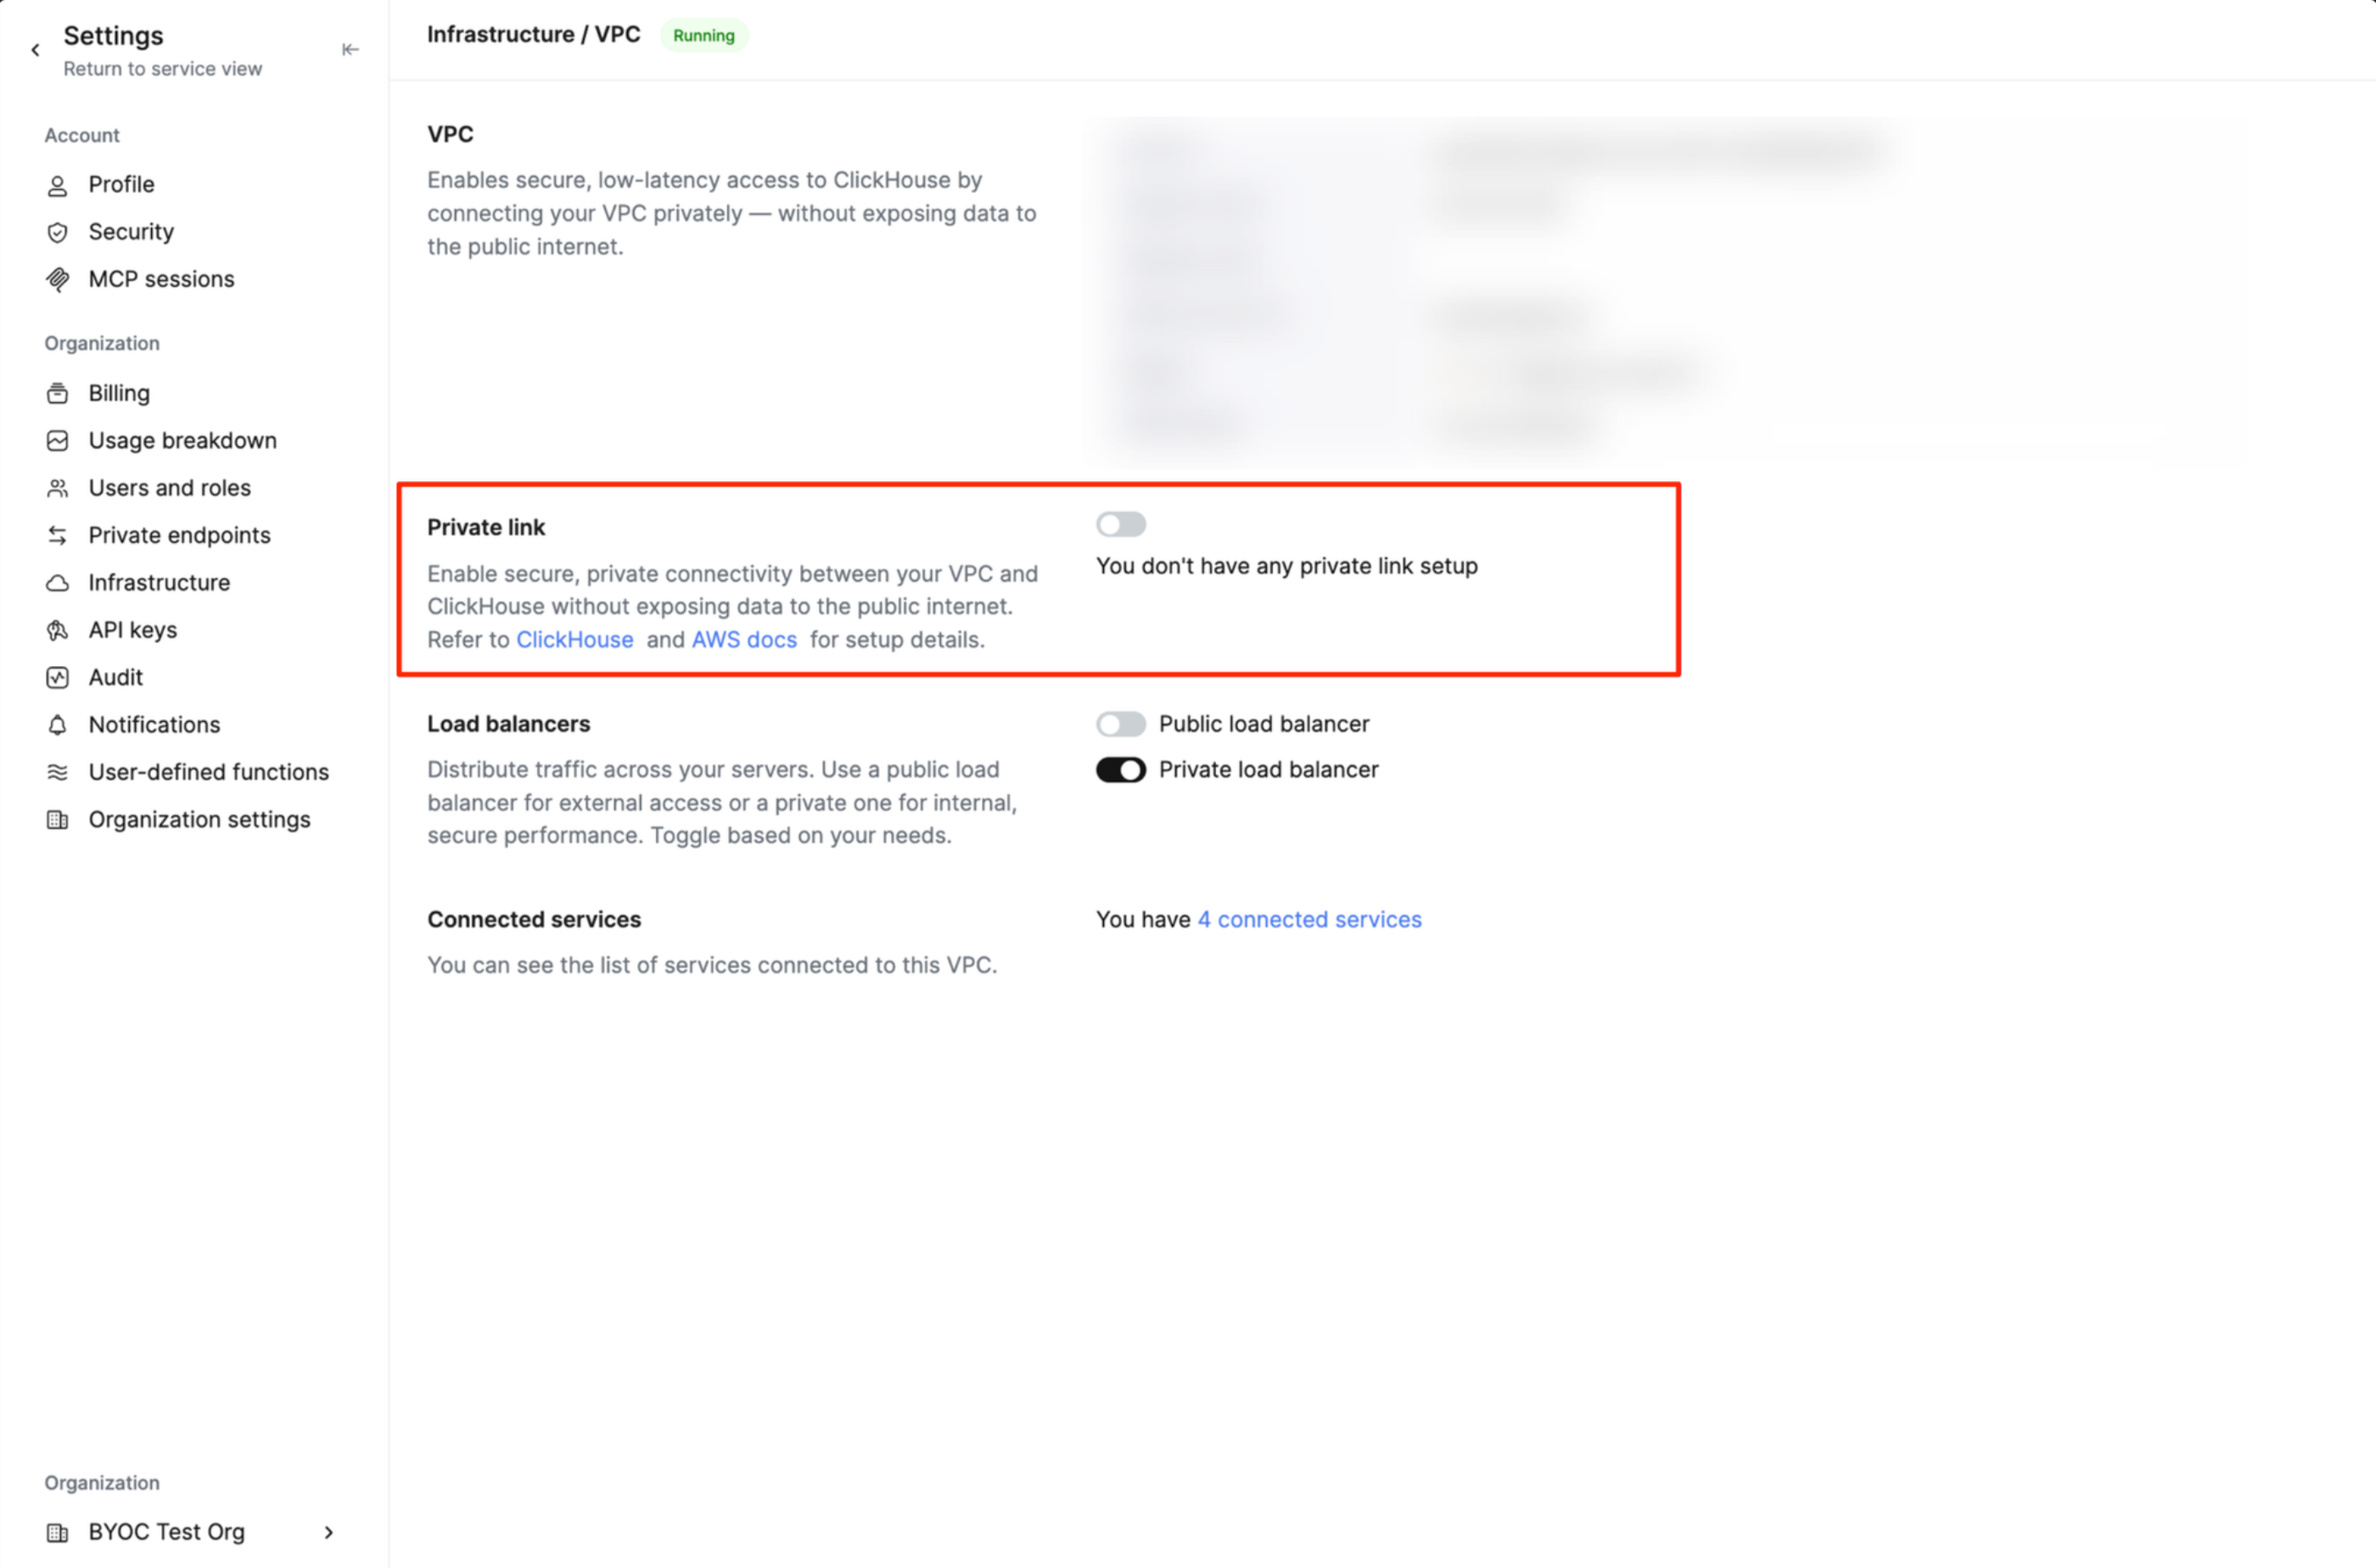
In the ClickHouse Cloud console, enable the Private load balancer for your BYOC infrastructure.
Set up VPC peering
Please familiarize yourself with GCP VPC peering feature and note the limitations of VPC peering (for example subnet IP ranges can’t overlap across peered VPC networks). ClickHouse BYOC utilizes a private load balancer to allow network connectivity through the peering to ClickHouse services.
To create or delete VPC peering for ClickHouse BYOC, follow the steps:
Create a peering connection
In this example, we are setting up peering between the BYOC VPC network and another existing VPC network.
- Navigate to the “VPC Network” in ClickHouse BYOC Google Cloud Project.
- Select “VPC network peering”.
- Click “Create connection”.
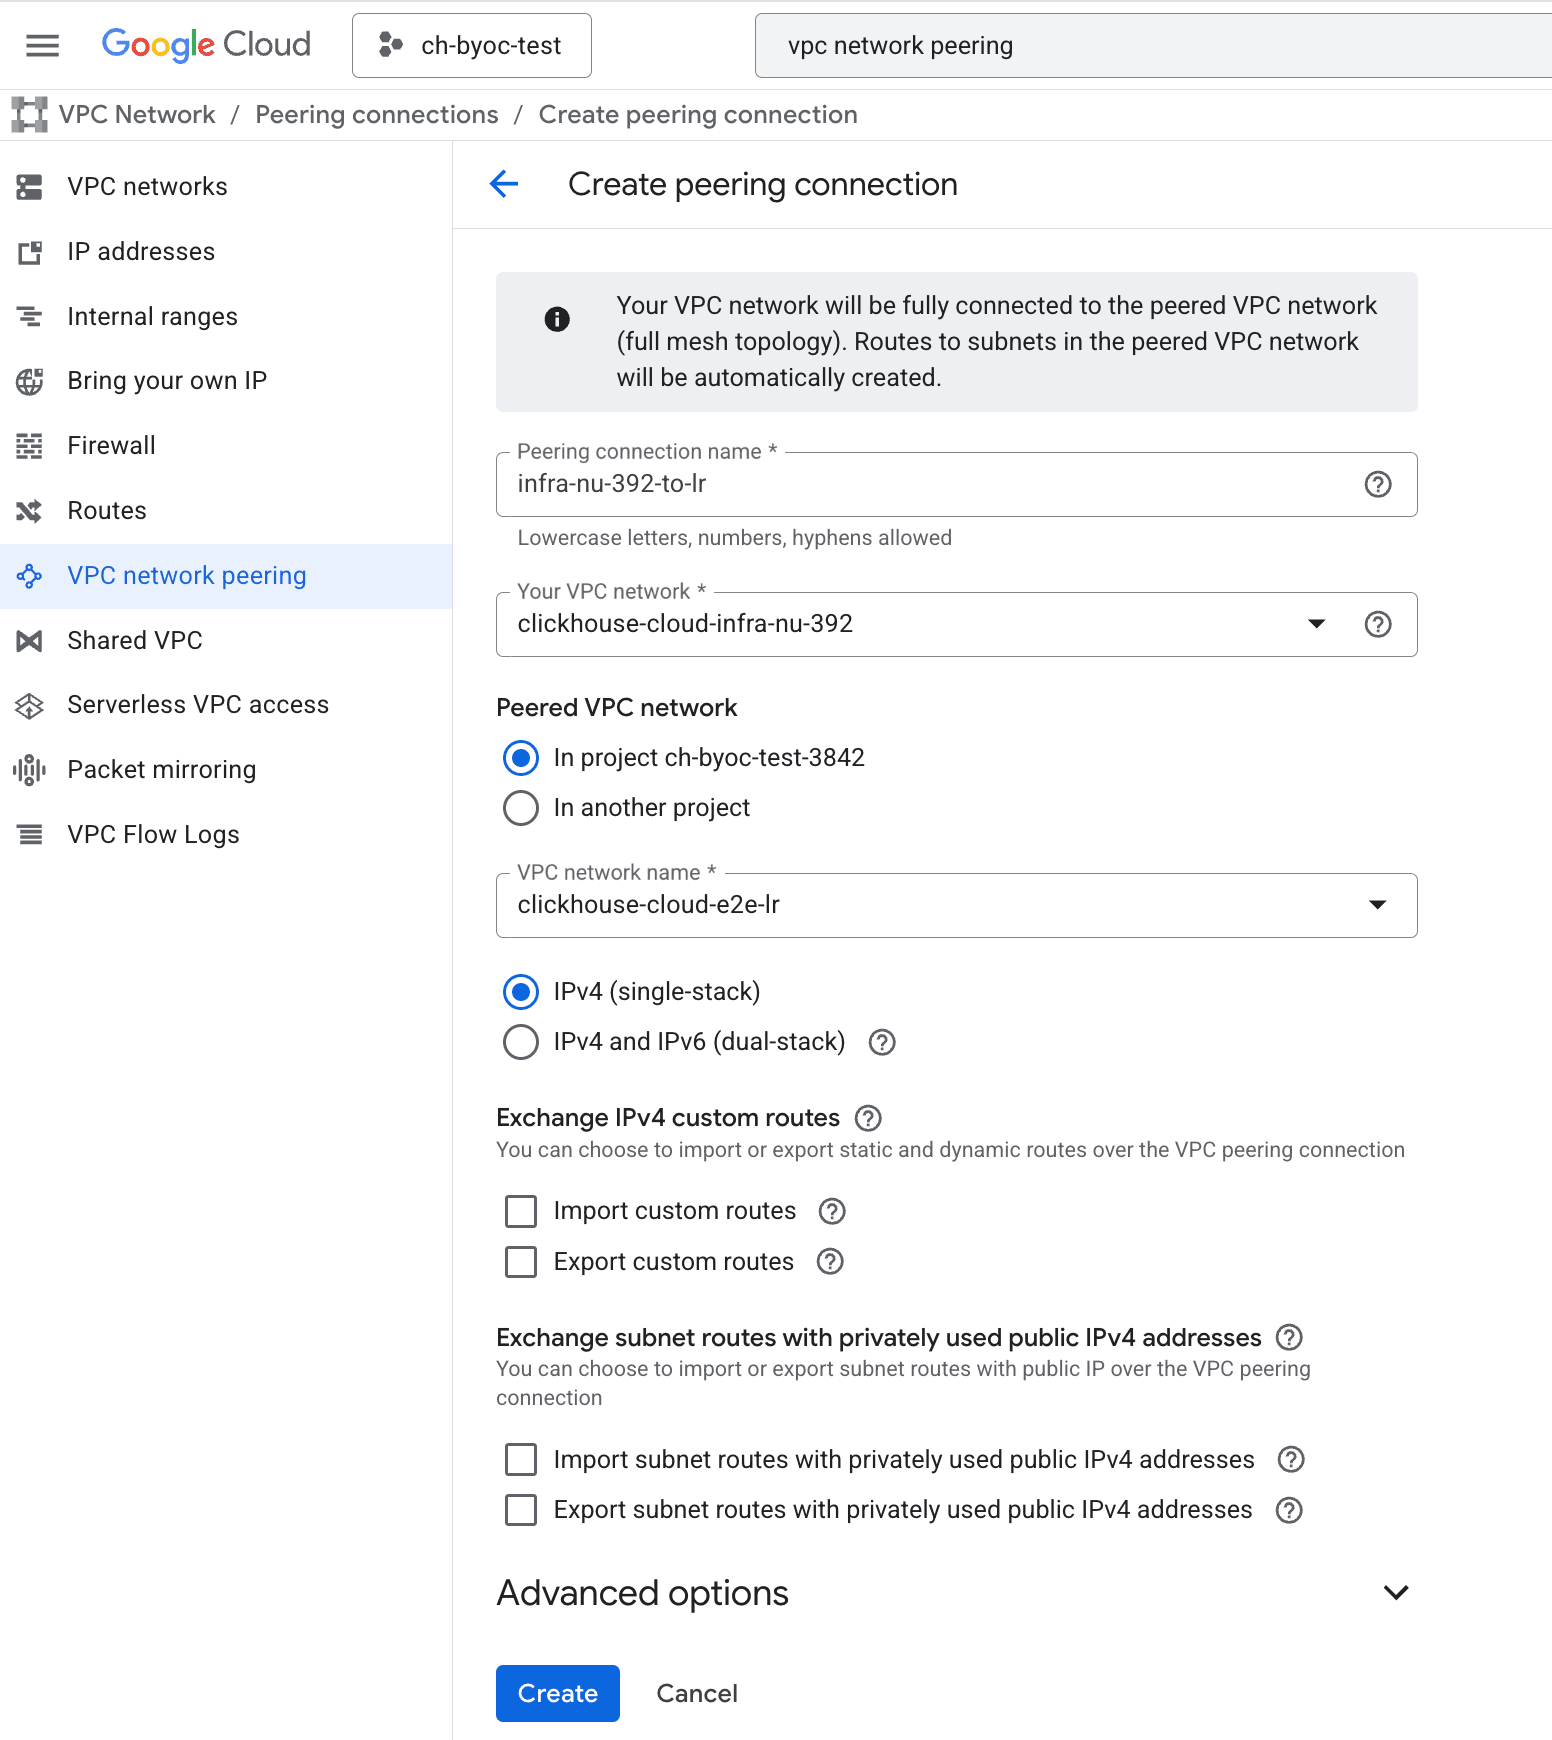
- Input the necessary fields as per your requirements. Below is a screenshot for creating a peering within same GCP project.
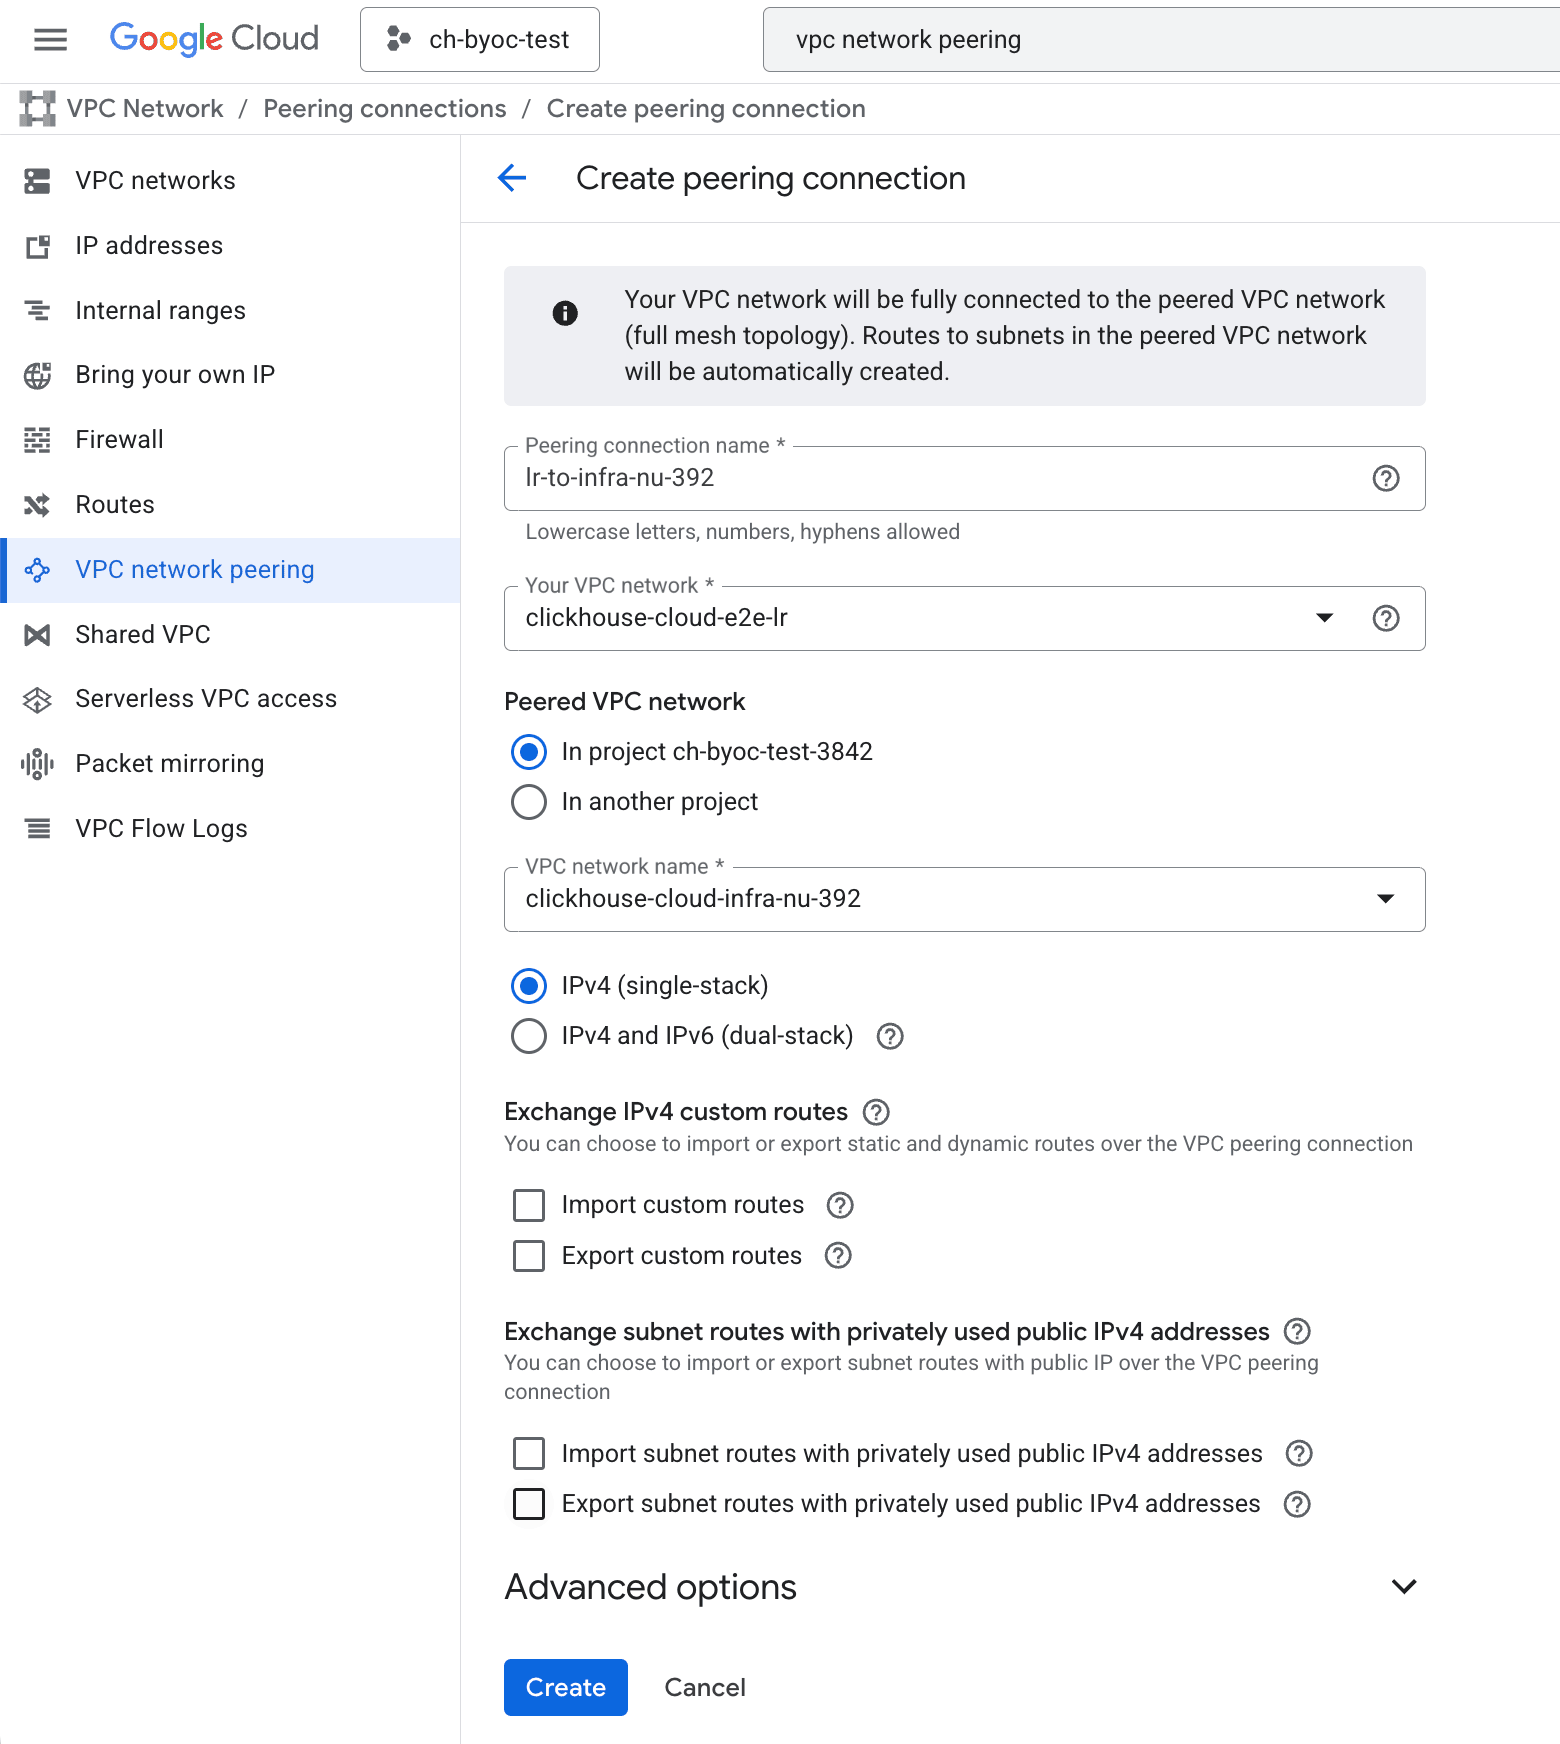
GCP VPC peering requires 2 connections between the 2 networks to work (i.e. a connection from BYOC network to the existing VPC network and a connection from the existing VPC network to the BYOC network). So you need to similarly create 1 more connection in reverse direction, below is a screenshot for the second peering connection creation:
After both connections are created, the status of the 2 connections should become “Active” after refreshing the Google Cloud Console webpage:
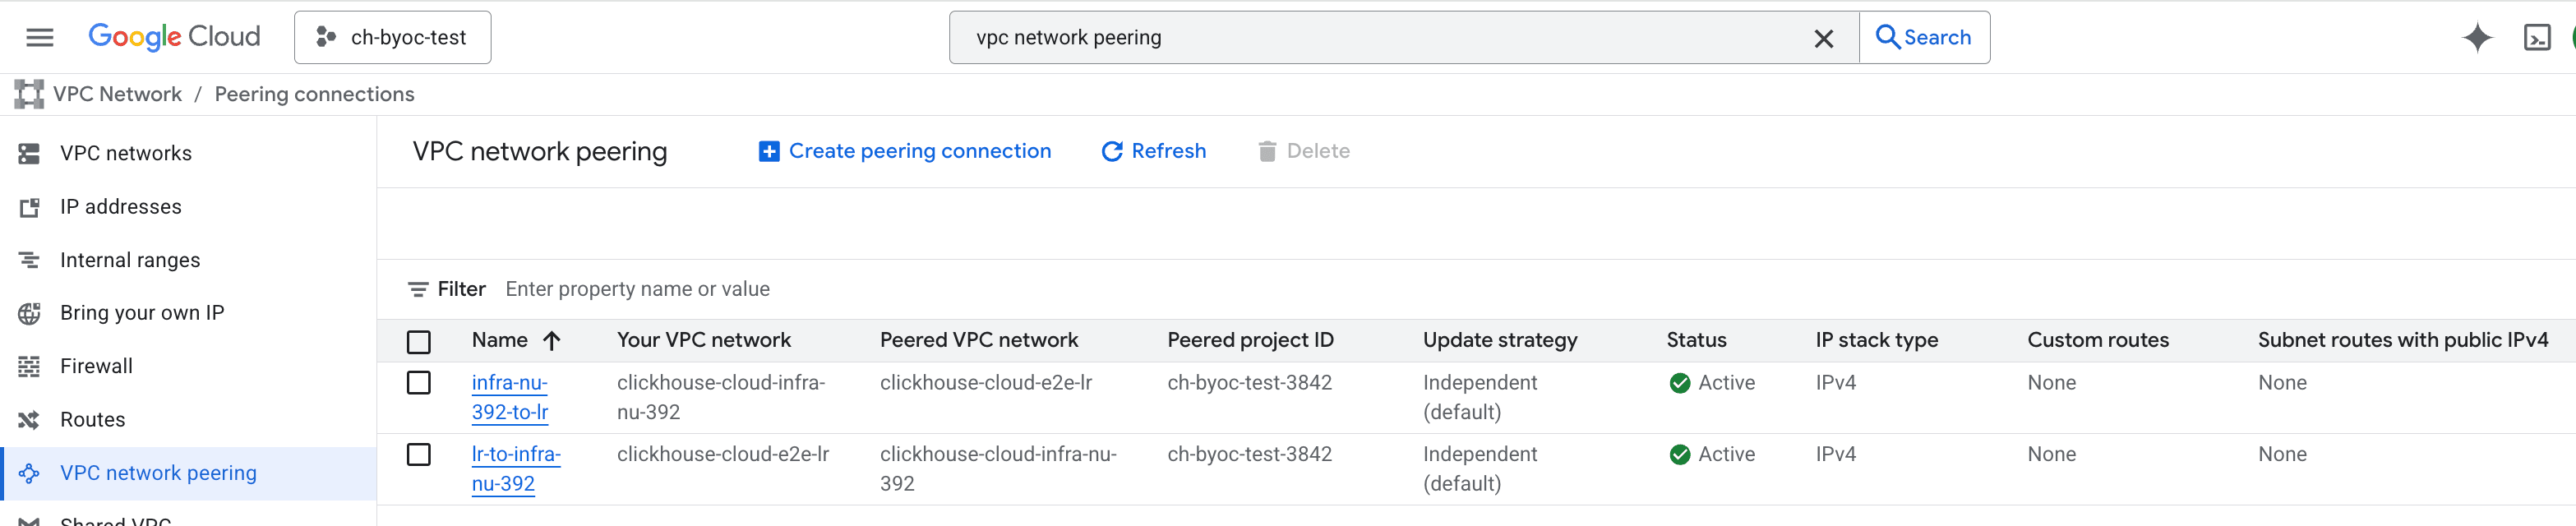
The ClickHouse service should now be accessible from the peered VPC.
Access ClickHouse service via peering connection
To access ClickHouse privately, a private load balancer and endpoint are provisioned for secure connectivity from the user’s peered VPC. The private endpoint follows the public endpoint format with a -private suffix. For example:
- Public endpoint:
h5ju65kv87.mhp0y4dmph.us-east1.gcp.clickhouse-byoc.com - Private endpoint:
h5ju65kv87-private.mhp0y4dmph.us-east1.gcp.clickhouse-byoc.com
Set up PSC (Private Service Connect)
GCP PSC (Private Service Connect) provides a secure and private connection to your ClickHouse BYOC services without the need for VPC peering or internet gateways. All traffic flows within the GCP network, ensuring that it never traverses the public internet.
Enable private link in ClickHouse console
[object Object]
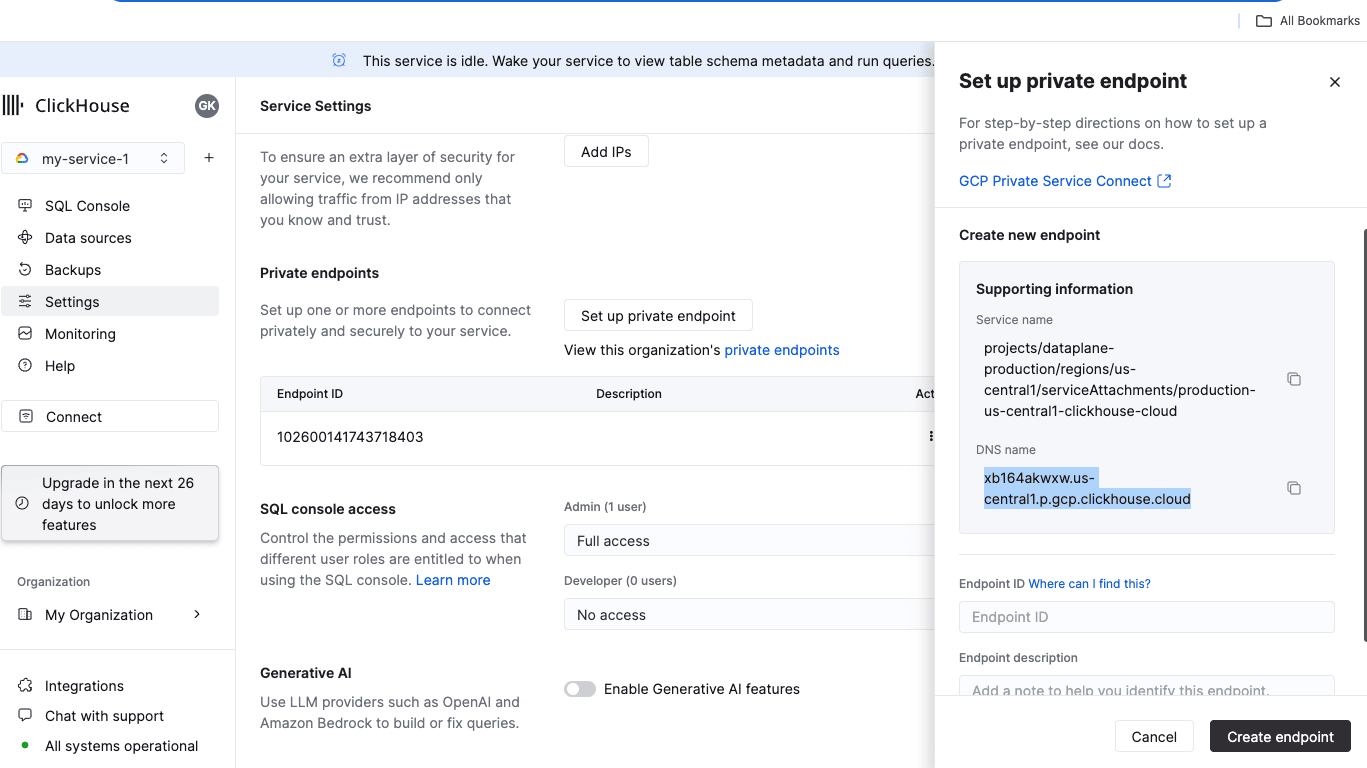
- In the ClickHouse Cloud console, navigate to the service’s Settings page that you would like to connect to via PSC.
- Click “Set up private endpoint”.
- In the opened flyout, copy the
Service nameandDNS namevalue — you’ll use them in the next step. (It may take a while for the value to be generated after enabling private link.)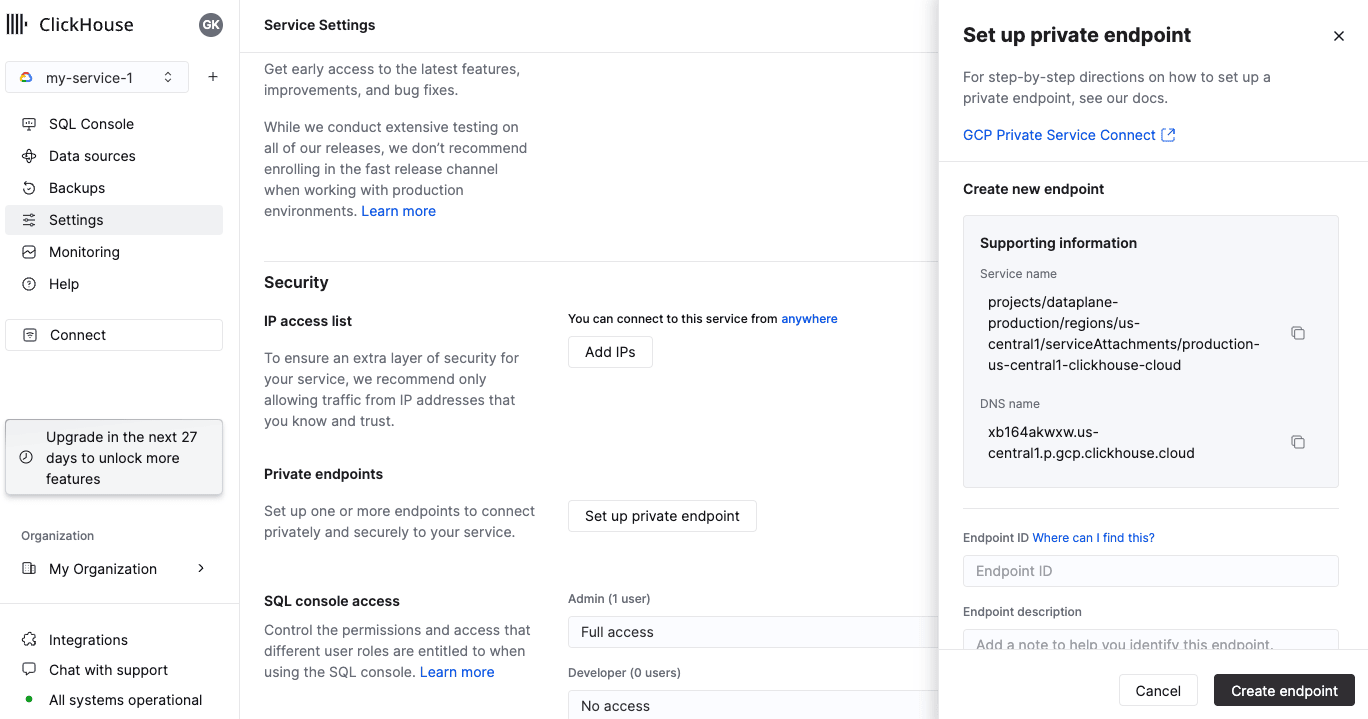
Create endpoint in your network
-
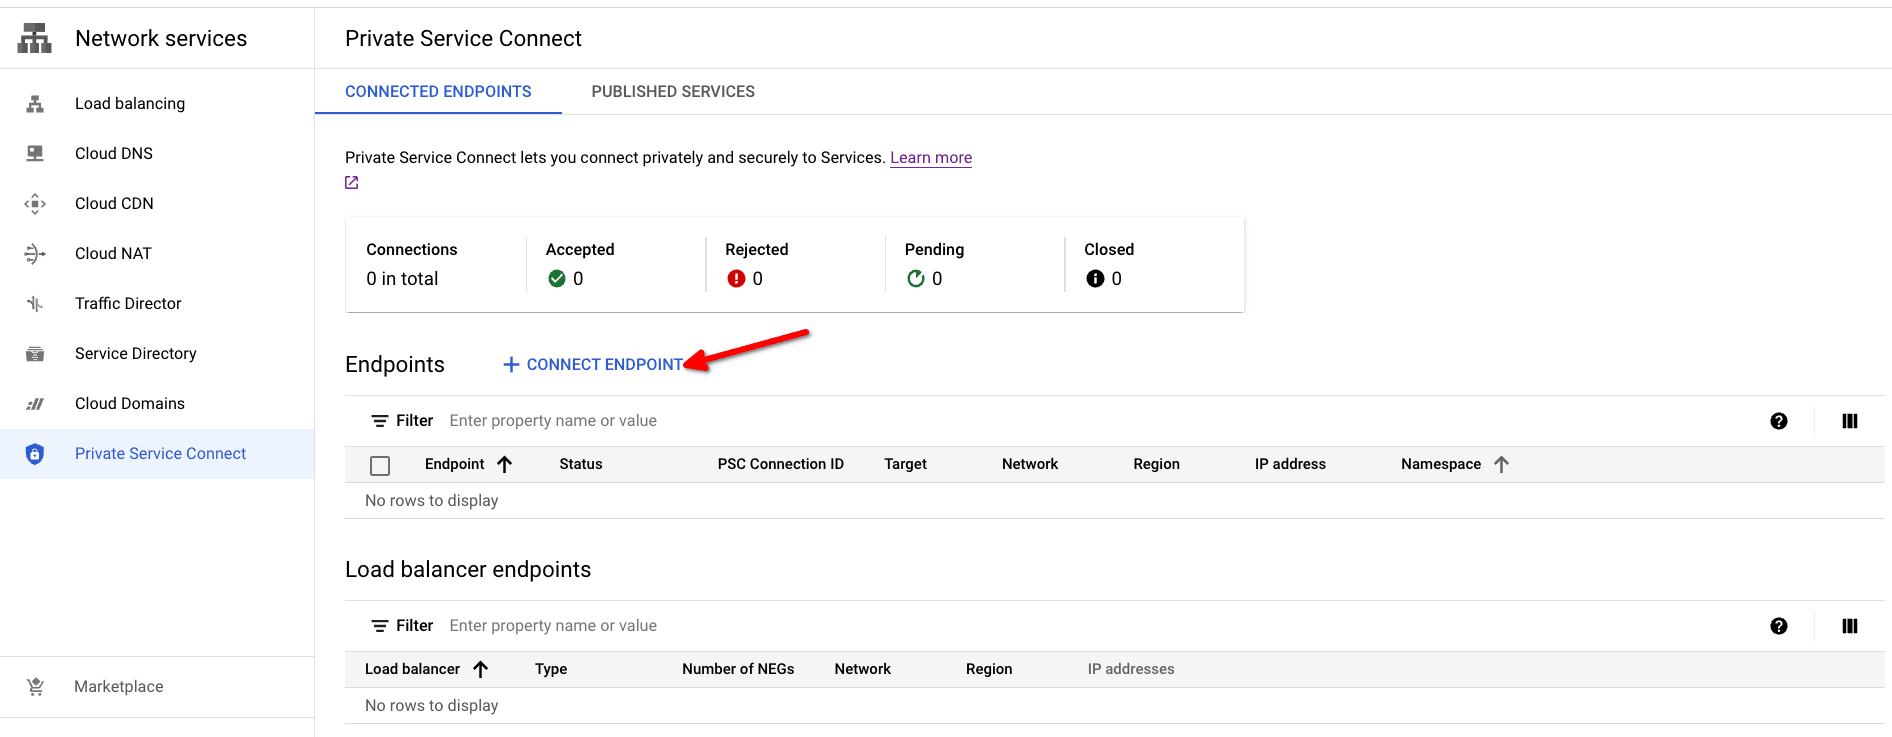
Open your own GCP console (i.e. the GCP account where your client application is) → Network Services → Private Service Connect → Connected Endpoints.
-
Open the Private Service Connect creation dialog by clicking the “Connect Endpoint” button.
-
Input the following fields:
- Target: use
Published service - Target service: use
Service nameobtained from the last step - Endpoint name: input a valid endpoint name
- Network/Subnetwork: choose the network you want to use for the connection; this is the network where your client application will be connecting from
- IP address: choose or create a new IP address for the endpoint; the IP address needs to be used by step Set private DNS name for endpoint
- (optional) Enable global access: enable it if you want to make the endpoint available from any region
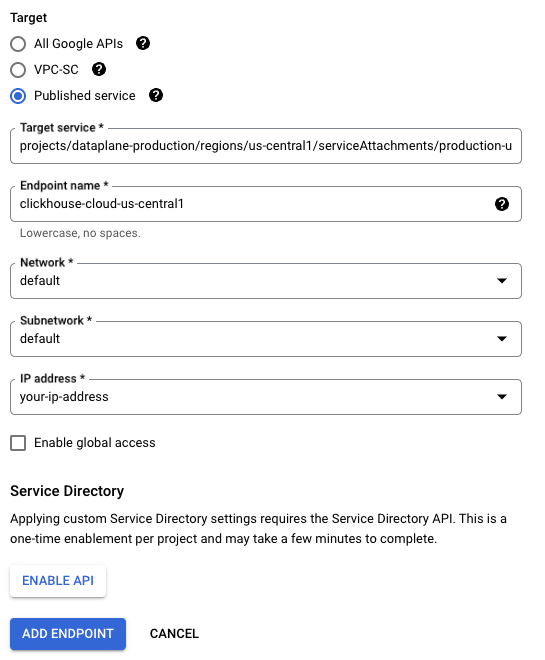
- Click “ADD ENDPOINT” button to create the endpoint.
- Target: use
-
The Status column will change from Pending to Accepted once the connection is approved.
-
After creating the endpoint, copy the
PSC Connection IDvalue — you’ll use it in the next step.
[object Object]
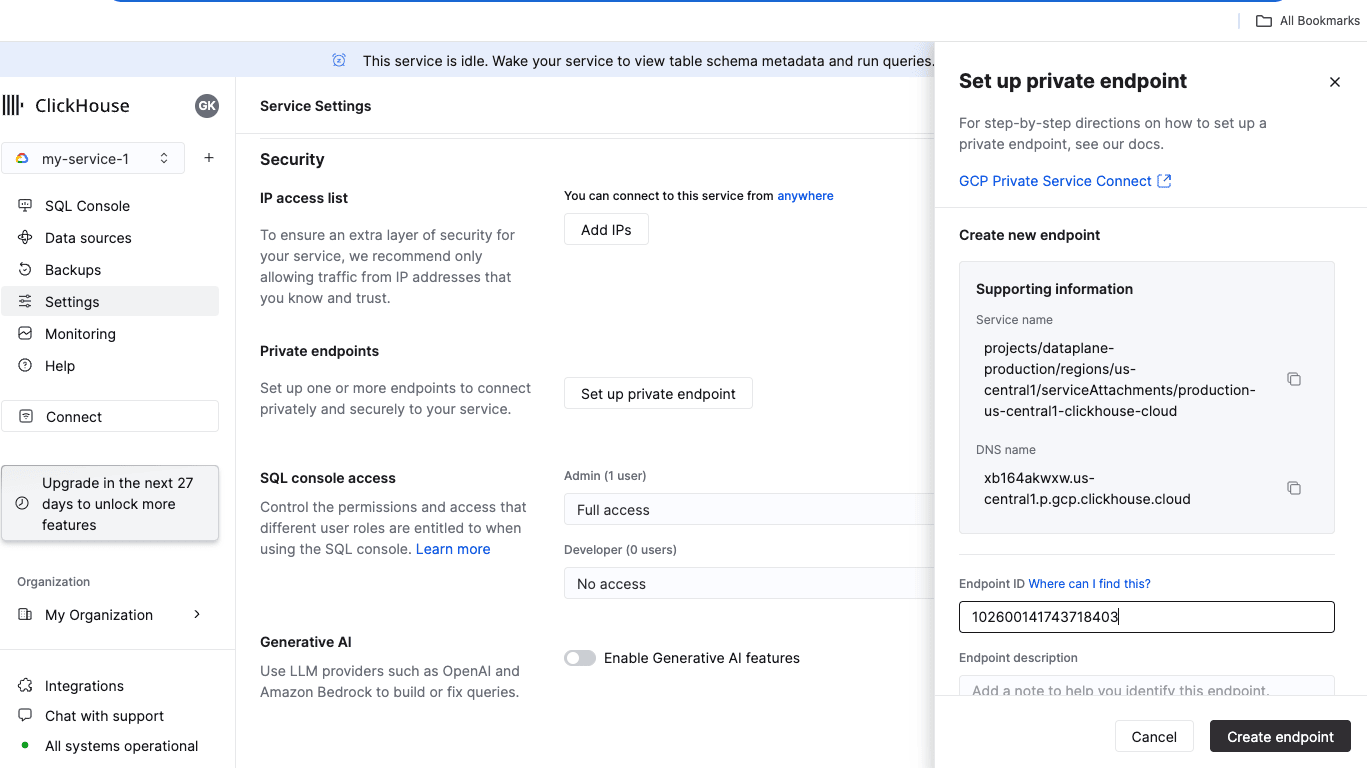
- In the ClickHouse Cloud console, navigate to the service’s Settings page that you would like to connect to via PSC.
- Click “Set up private endpoint”.
- In the opened flyout, enter the
PSC Connection IDobtained from the last step into theEndpoint IDfield with an optional description. - Click “Create endpoint”.
Set private DNS name for endpoint
You need to point all subdomains (wildcard) of the “DNS name” to GCP PSC endpoint IP address. This ensures that services/components within your VPC/Network can resolve it properly.
Access an instance using PSC
- In the ClickHouse Cloud console, navigate to service’s Settings page.
- Click “Set up private endpoint”.
- In the opened flyout, copy the
DNS name.